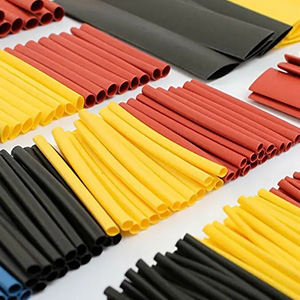
1. Preparation
- Choose the Right Heat Shrink Tubing: Select tubing with the appropriate diameter, shrink ratio, and material (e.g., polyolefin is commonly used). The tubing should be large enough to fit over the object but small enough to shrink tightly when heated.
- Cut to Length: Cut the heat-shrink tubing to the desired length. Ensure it covers the area needing insulation, with extra length on either side for secure coverage.
2. Application
- Place the Tubing: Slide the tubing over the wire or component that needs to be insulated. Ensure it’s positioned accurately before shrinking.
- Heating the Tubing: Use a heat gun or other heat source, like a lighter, to evenly heat the tubing. The tubing will contract as it heats, wrapping tightly around the wire or component. Rotate the tubing as you heat it to ensure even shrinkage and avoid overheating any one spot.
3. Post-Application
- Inspect the Insulation: After shrinking, check the tubing to ensure it has fully adhered to the surface and there are no gaps or air bubbles.
- Cooling: Allow the tubing to cool completely before handling or testing the insulated wires or components.
4. Double Layering (Optional)
- Add a Second Layer: For additional insulation or protection, a second layer of heat shrink tubing can be applied after the first layer has shrunk and cooled.
Common Uses
- Wire Splicing and Repair: Protecting spliced wires or repairing damaged insulation.
- Cable Strain Relief: Reducing stress at connection points and preventing wires from bending excessively.
- Environmental Protection: Sealing components from moisture, dust, or corrosion.
Tips for Success
- Ensure that the heat shrink tubing you use has a sufficient shrink ratio (e.g., 2:1, 3:1) for your application.
- Avoid overheating the tubing, which can cause it to melt or become brittle.
- Use adhesive-lined heat shrink tubing for applications requiring a watertight seal.
This technique is highly effective for providing a secure and lasting insulation solution for various electrical components.


