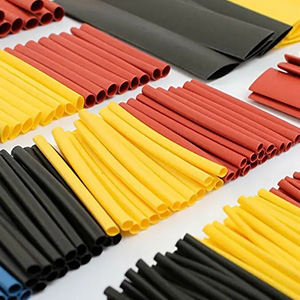
 Heat shrink insulation is a versatile and effective solution used to protect wires, cables, and other electrical components from damage caused by moisture, abrasion, and environmental factors. It’s often used in electronics, automotive applications, and industrial machinery. Here’s a simple guide to understanding what heat shrink insulation is, how it works, and how to use it.
What is Heat Shrink Insulation?
Heat shrink insulation is a type of plastic tubing that shrinks when heat is applied. The tubing is typically made of materials like polyolefin or PVC, which have properties that allow them to shrink and conform tightly to the object they are covering. The shrinking effect provides a snug fit that protects the underlying components, ensuring a strong seal that prevents moisture and dirt from entering.
How Does Heat Shrink Insulation Work?
- Material and Size: Heat shrink tubing comes in various diameters and thicknesses, allowing you to choose the right size for the cable or wire you are insulating. It’s available in pre-cut lengths or rolls, and can also be customized to suit your project.
- Application of Heat: When heat is applied (usually with a heat gun), the tubing shrinks in both length and diameter, tightly conforming to the surface of the wire or component it is covering. This creates a durable, protective barrier.
- Adhesive Options: Some heat shrink insulation has an adhesive lining on the inside. This adhesive melts when heated, bonding the tubing to the surface and providing an extra layer of protection, especially in more demanding environments.
Key Benefits of Heat Shrink Insulation
- Moisture Protection: It creates a waterproof seal around electrical components, helping to prevent damage from rain, humidity, or splashes.
- Abrasion Resistance: Heat shrink insulation offers protection against physical wear and tear, such as friction from rough surfaces or vibrations.
- Insulation: It provides electrical insulation, preventing shorts or damage to wires in high-voltage environments.
- Durability: Heat shrink tubing is highly durable, often withstanding exposure to harsh chemicals, oils, and extreme temperatures.
- Neat Appearance: It provides a clean, professional finish to electrical wiring, hiding any visible wiring and reducing the risk of entanglements.
Common Uses of Heat Shrink Insulation
- Electrical Wiring: Protects and insulates wires and cables in automotive, electronics, and industrial applications.
- Connector Insulation: Used around connectors to ensure a secure and safe electrical connection.
- Repair and Protection: This can be used to repair damaged insulation on cables or wires.
- Heat Shrink Sleeving for Protection: Often used in combination with other components like labels, providing both protection and identification.
How to Apply Heat Shrink Insulation
- Cut the Tubing: Select the right diameter and length of heat-shrink tubing for your application. It should be slightly larger than the component you’re covering.
- Slide the Tubing Over the Component: Slide the tubing over the wire or component you want to insulate. Make sure it fits properly and covers the area that needs protection.
- Apply Heat: Using a heat gun (or other heat sources like a hairdryer or lighter), apply heat evenly to the tubing. Hold the heat gun a few inches away from the surface, moving it around to avoid overheating any one spot.
- Allow the Tubing to Shrink: The tubing will begin to shrink, tightening around the component. Continue applying heat until the tubing is fully shrunk and securely in place. If the tubing has adhesive, it will bond to the surface.
- Let It Cool: Allow the tubing to cool and set before handling.
Conclusion
Heat shrink insulation is an excellent choice for protecting wires, cables, and electrical components in a variety of environments. With its ease of use, durability, and versatility, it’s a go-to solution for many industries. Whether you’re working on a DIY electronics project or a professional wiring installation, understanding how to use heat shrink tubing can help you ensure a safe and secure outcome.

