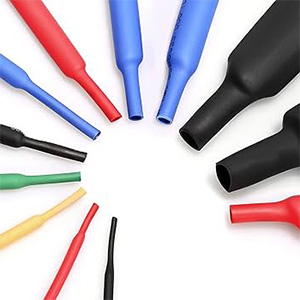
 Heat shrink tubing is a versatile tool used to insulate, protect, and organize wires and cables. While it’s relatively easy to use, a few simple tips can make a big difference between a messy result and a professional finish. Whether you’re new to using heat shrink or just want to sharpen your technique, these simple heat shrink tips will help you get clean, durable results every time.
1. Choose the Right Size
Selecting the correct size of heat shrink tubing is essential. Always choose tubing with a diameter about 20–30% larger than the component you plan to cover. After shrinking, the tubing should fit snugly without gaps or wrinkles. Pay attention to the shrink ratio (like 2:1 or 3:1), which tells you how much the tubing will contract when heated.
Tip: When in doubt, measure the widest part of your component and pick tubing slightly larger before shrinking.
2. Pre-Cut Your Tubing
Before making connections or repairs, cut your heat shrink tubing to the desired length. It’s much easier to slip the tubing over your wire or joint before soldering or connecting anything. Trying to add it afterward can be frustrating or even impossible.
Tip: Leave a little extra tubing length to ensure complete coverage and overlap over any joints or splices.
3. Use a Heat Gun (Not an Open Flame)
Although some people use lighters or matches, it’s best to use a heat gun for applying heat shrink tubing. Heat guns distribute heat evenly and reduce the risk of burning or charring the tubing. Open flames can cause uneven shrinking, bubbles, or even melt the tubing.
Tip: Move the heat gun slowly back and forth, keeping it at a safe distance to avoid overheating.
4. Shrink Slowly and Evenly
Patience is key for clean results. Apply heat gradually and rotate the wire or object if possible, ensuring the tubing shrinks evenly from all sides. Rushing the process can cause wrinkles, air pockets, or weak insulation.
Tip: Start heating from the middle and work your way outward to push any trapped air out.
5. Consider Adhesive-Lined Tubing for Extra Protection
If you need waterproofing or a stronger bond, adhesive-lined heat shrink tubing (also called dual-wall tubing) is the way to go. As it shrinks, the inner adhesive melts and fills gaps, providing a watertight and secure seal ideal for outdoor, marine, or automotive use.
Tip: Make sure surfaces are clean and dry before applying adhesive-lined tubing for the best results.
6. Organize with Color Coding
Heat shrink tubing comes in many colors, and using different colors for different cables or wires is a simple way to organize your setup. It also makes troubleshooting and maintenance easier down the road.
Tip: Create a color key for your wiring projects to keep things consistent and easy to identify.
Using heat shrink tubing effectively isn’t complicated, but a few simple habits can dramatically improve the quality of your work. By choosing the right size, using a heat gun, shrinking slowly, and considering special tubing types like adhesive-lined options, you’ll achieve neat, professional results every time. Whether you’re repairing, insulating, or organizing, these easy heat shrink tips will make your projects safer and longer-lasting.


