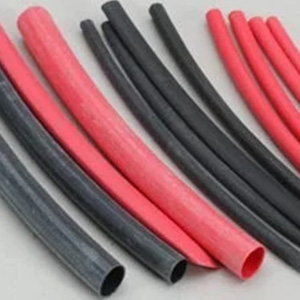
 Heat shrink tubing is one of those supplies that’s easy to collect but difficult to keep organized—especially when you have different sizes, colors, and types. A messy pile of tubing not only slows down your work but can also lead to wasted material and frustration. Fortunately, with a few simple strategies, you can keep your heat shrink tubing neatly organized and ready for any project. Here’s how to bring order to your workspace and make working with heat shrink easier than ever.
1. Sort by Size and Shrink Ratio
Since heat shrink tubing comes in a wide variety of diameters and shrink ratios (like 2:1 or 3:1), keeping them sorted is critical. Mixing them up can lead to mistakes and wasted pieces when you’re in a hurry.
Tip: Use small bins, drawers, or zippered plastic bags labeled by size and shrink ratio. Consider color-coding the labels for faster identification.
2. Use a Compartment Organizer
Fishing tackle boxes, hardware organizers, or dedicated wire management cases work perfectly for storing heat shrink tubing. These organizers have individual compartments to separate different sizes and colors, keeping everything visible and easily accessible.
Tip: Choose a box with adjustable dividers so you can customize the compartments based on your most-used sizes and types.
3. Store in Tubing Dispensers
For larger projects or workspaces that require frequent access, heat shrink tubing dispensers are a fantastic option. They hold long rolls or precut lengths and allow you to pull and cut just the amount you need.
Tip: Wall-mounted dispensers can save desk space and give your workshop a more professional, organized look.
4. Label Everything Clearly
Even if your tubing is stored neatly, it’s easy to confuse similar-looking sizes or colors. Labeling each section clearly helps you find exactly what you need quickly, reducing guesswork and mistakes.
Tip: Use waterproof labels or a label maker for a clean, durable finish.
5. Keep a Small Portable Kit
If you often work on-the-go or tackle different projects around the house or shop, keeping a small portable kit with essential heat shrink tubing sizes is a smart move. Fill a small case with commonly used tubing so you don’t have to lug around your entire stockpile.
Tip: Include a mini heat gun or lighter (used carefully) in your portable kit for quick fixes.
6. Regularly Check and Refill
Heat shrink tubing can run out without you noticing, especially popular sizes like 1/8″ or 3/16″. Make it a habit to check your inventory regularly and reorder supplies before you run out.
Tip: Keep a running list of sizes you use most often so reordering is quick and easy.
Staying organized isn’t just about keeping your workspace looking good—it saves time, reduces frustration, and helps your projects go smoother. By sorting your heat shrink tubing by size and type, using organizers or dispensers, labeling carefully, and maintaining a portable kit, you’ll always have the right tubing ready when you need it. Investing a little time into organizing your heat shrink now can lead to better, faster work on every future project.