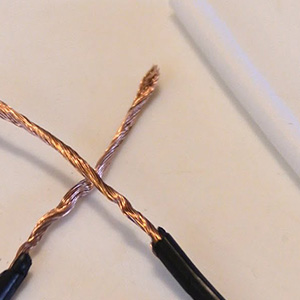
 Heat shrink tubing is a versatile tool used in various repair and insulation applications. Here’s a guide on how to repair wires or other cylindrical objects using heat shrink tubing:
Materials Needed
- Heat shrink tubing (appropriate size and shrink ratio for the repair)
- Heat gun or another heat source (like a lighter or hairdryer)
- Wire cutters/strippers (if working with wires)
- Electrical tape (optional, for added insulation)
Steps for Repairing Wires with Heat Shrink Tubing
- Prepare the Wire:
- Ensure the wire is clean and free from debris.
- Cut and strip the ends of the wire to expose a small length of the conductor, if necessary.
- Select the Heat Shrink Tubing:
- Choose a piece of heat shrink tubing that is slightly larger in diameter than the wire or object being repaired.
- The tubing should be long enough to cover the damaged area and extend slightly beyond it on both ends.
- Slide the Tubing Over the Wire:
- Before making any connections or repairs, slide the heat shrink tubing over one end of the wire.
- Ensure it is positioned away from the area you will be working on to avoid premature shrinking.
- Make the Repair:
- Connect or repair the wire as needed (e.g., soldering or twisting the wires together).
- Ensure the connection is secure and properly insulated if necessary.
- Position the Tubing:
- Slide the heat shrink tubing over the repaired area, centering it so that it covers the entire repair and extends slightly on both ends.
- Shrink the Tubing:
- Use a heat gun or other heat source to evenly heat the tubing.
- Start from the center and work your way to the edges to ensure even shrinking and avoid trapping air bubbles.
- The tubing will shrink tightly around the wire, providing insulation and protection.
- Inspect the Repair:
- Ensure the tubing has shrunk evenly and there are no gaps or exposed areas.
- If additional insulation is needed, you can wrap the area with electrical tape.
Tips
- Choose the Right Tubing: Ensure you select tubing with the correct diameter and shrink ratio. Tubing typically shrinks to half its original size, so choose accordingly.
- Use a Proper Heat Source: A heat gun is ideal as it provides controlled, even heat. If using a lighter, be cautious to avoid overheating and damaging the tubing.
- Multiple Layers: For added protection, you can use multiple layers of heat shrink tubing, especially in high-stress areas.
Applications
- Electrical Repairs: Insulating and protecting wire splices, connections, and terminations.
- Mechanical Repairs: Reinforcing and repairing damaged cables, ropes, or hoses.
- Labeling and Identification: Color-coded tubing can be used for labeling wires and cables for easy identification.
Using heat shrink tubing for repairs is an effective way to ensure connections are protected and insulated, extending the life of the repaired item.


